Showing posts with label Baking Time. Show all posts

Friday, April 27, 2012

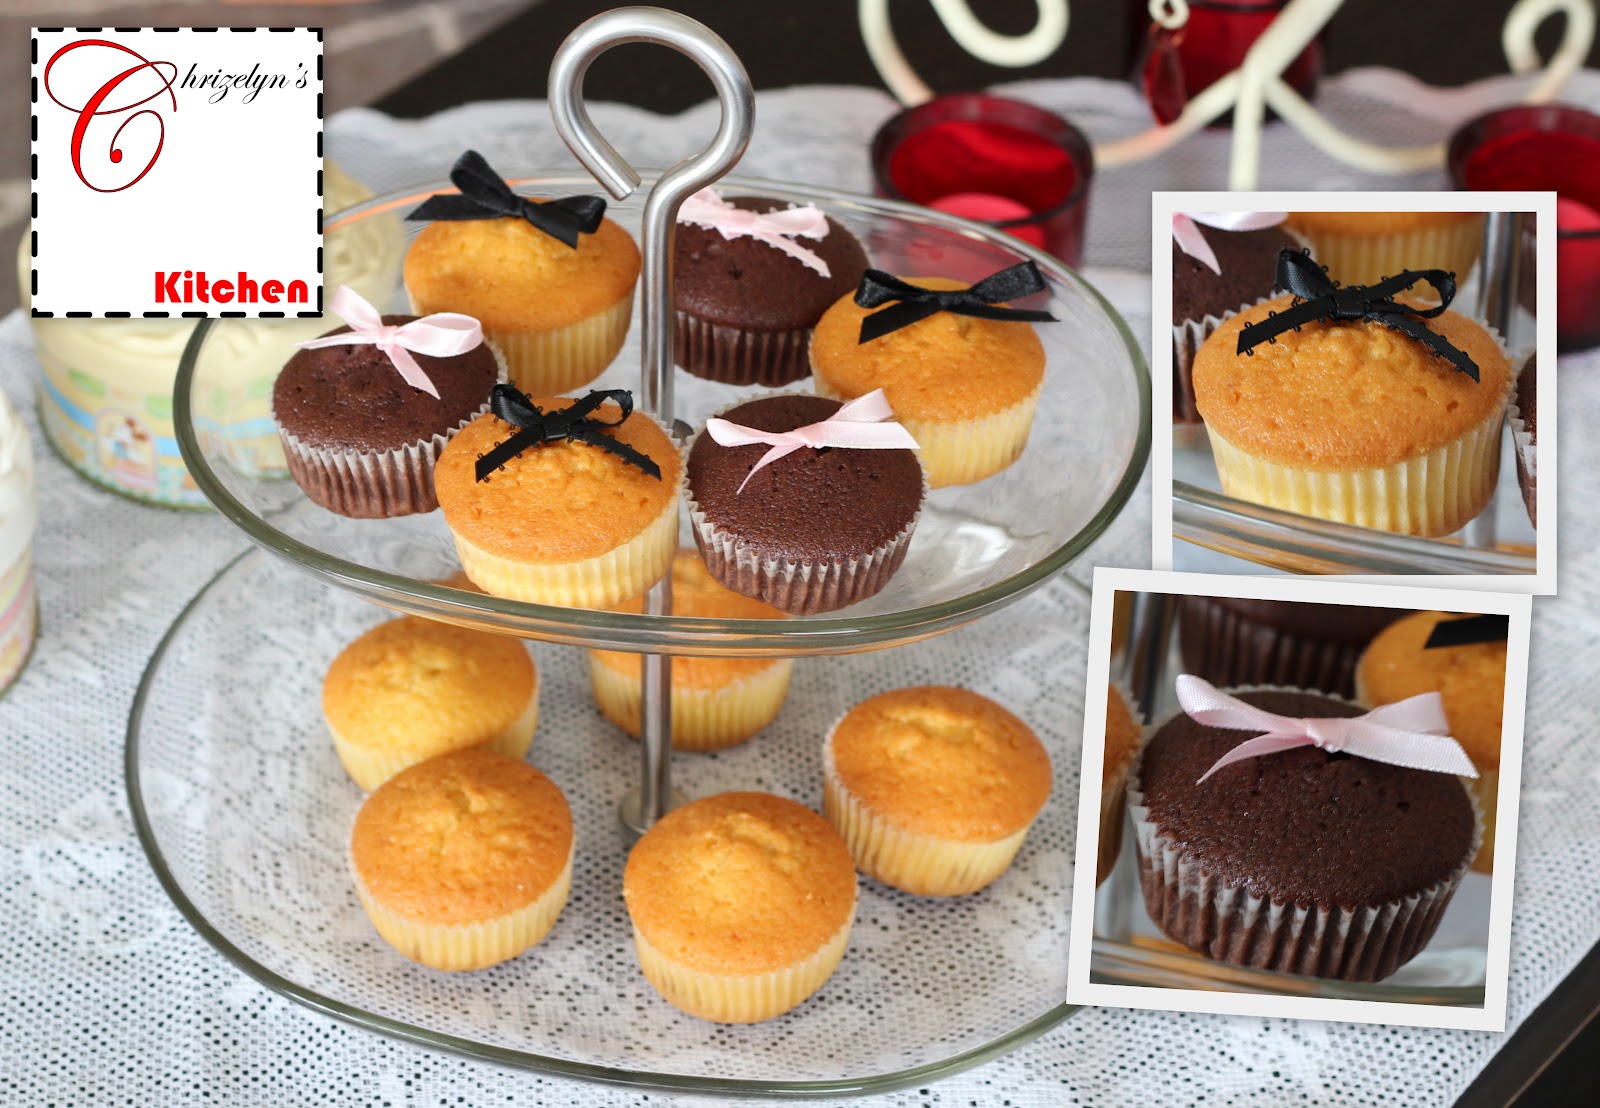
Chocolate Cupcake

I have bake Vanilla Raisin Butter Cake countless of times, therefore yesterday i decided to try something new. I add chocolate to the vanilla raisin butter cake and to my surprise it was equally delicious. 


It was quite easy to bake this. Firstly i used the Vanilla Raisin Butter Cake Recipe, i omit the vanilla extract and add in one tablespoon of hot water with two tablespoon of cocoa powder and stir well then i add in to the cake mixture.

Ingredient
  • 120g butter 
  • 120g sugar
  • 120g self-raising flour
  • 2 large egg
  • 1 Tbsp hot water
  • 2 Tbsp cocoa powder
  • 1 cup raisin (you may increase the amount)
Methods
  • Preheat your oven to 170⁰C. Prepare your cupcake tray and line 12 hole with paper cases.
  • Lightly beat the 2 eggs in a bowl.
  • Sift the flour and set aside
  • Use a mixer to cream the butter and sugar until light and fluffy. (Butter at room temperature)
  • Gradually add eggs with a little flour and beat until smooth. (Divide the egg into 4-5 portions)
  • Pour in the raisins and stir in with a spatula until even.
  • Mix the hot water and cocoa powder in a bowl, mix well.
  • Pour the chocolate mixture into the cake mixture, use a spatula and fold in the mixture until even.
  • Divide the mixture equally and pour into paper cases.
  • Bake for 15-20 min until golden brown.


Monday, April 23, 2012

Vanilla Raisin Butter Cake

Vanilla Raisin Butter Cake
I have bake this vanilla raisin butter cake so many times, and the recipe never failed me. The ingredient called for are normal and the steps are easy. The original recipe is only buttercake and i add the raisins in it to make it taste better. I always put lots of raisins and the best part is my hubby love it too. It is nice to have it for my afternoon tea break and during road trip as it can keep for up to a week. Therefore i usually bake alot and keep it in a air-tight container. Sometimes when my hubby reach home and dinner is not ready, he will eat some of these first. I forgotten to say my little doggie also love it. BUT if you are giving it to your dog, never feed the raisin. Raisin like chocolate is toxin to doggies.

Things to remember when using this recipe:

  1. Never use a cupcake paper case. I have tried a few times, the top will crack, therefore i always used this low cut paper case.
  2. Use butter and eggs at room temperature.
  3. The surface is suppose to be golden brown and slightly crispy. Baking time is about 15-20min, but if the surface is not brown, bake for another 5 mins.

Ingredient
  • 120g butter 
  • 120g sugar
  • 120g self-raising flour
  • 2 large egg
  • 1/2 tsp vanilla extract
  • 1 cup raisin (you may increase the amount)
Methods
  • Preheat your oven to 170⁰C. Prepare your cupcake tray and line 12 hole with paper cases.
  • Lightly beat the 2 eggs in a bowl.
  • Sift the flour and set aside
  • Use a mixer to cream the butter and sugar until light and fluffy. (Butter at room temperature)
  • Pour in the vanilla extract and mix well.
  • Gradually add eggs with a little flour and beat until smooth. (Divide the egg into 4-5 portions)
  • Pour in the raisins and stir in with a spatula until even.
  • Divide the mixture equally and pour into paper cases.
  • Bake for 15-20 min until golden brown.

Tuesday, April 03, 2012

Cheesecake

My love is pastry and one of my favorite is cheesecake. Back in Singapore, when we dine out at Bukit Panjang Plaza Shopping Center, after dinner we will go queue up at Cafe Cartel for the 50% cake discount at 9.00pm. We will usually buy four pieces, two for supper and two for breakfast the next day. 

Here in France, i have not come across any bakery that sell cheesecake. After researching, result shows that french only eat cheese but hardly use it for bakery. So i decided to bake my own cheesecake. BUT i have no idea what cream cheese is called in french and also have hard time researching for the correct name in french. Finally after months of searching, i found the ans. (For creamcheese brand in France, please visit my post named Cream cheese in France) So now i can successfully bake a real cheesecake.

I am using Philadelphia brand cream cheese and i know that Kraft has lots of recipe for cheesecake. 
I tried out two types of cheesecake, one is Traditional Cheesecake and the other one is  Everso Easy  Cheesecake.  

Everso Easy Cheesecake
Traditional Cheesecake
When i first tried out Everso Easy Cheesecake, i love it but i do not like the bottom crust. I used biscuit layer for the bottom crust as the Everso Easy Cheesecake which is creamy therefore it required a hard base to hold the cake. Then i tried out the Traditional Cheesecake which my hubby prefer more. So instead of making a crust for the Everso Easy Cheesecake, i used the Traditional Cheesecake as the base. So here is my 2 in 1 Cheesecake.

*If you would like to try my 2 in 1 Cheesecake, just ignore preparing the base)

Original Recipe for Everso Easy Cheesecake
(extracted from www.philadelphia.co.uk)
Ingredients 125 g digestive biscuits crumbs
40 g butter, melted
250 g Philadelphia Original
397 g can condensed milk
120 ml fresh lemon juice, approx 3 lemons
200 mixed summer fruits e.g. strawberries, raspberries, blueberries 

Methods

  1. Combine the biscuit crumbs and melted butter and press into the base of an 18 cm loose bottomed cake tin and chill whilst preparing the filling.
  2. Whisk together the Philly and condensed milk. Then stir in the lemon juice until mixed. Pour over the prepared base and chill for at least 1 hour until set.
  3. Decorate with the summer fruits.
Original Recipe for Traditional Cheesecake
(extracted from www.philadelphia.co.uk)
Ingredients
150 g biscuit crumbs 
50 g butter
400 g Philadelphia Original
200 g caster sugar
4 eggs
40 g plain  flour
150 ml soured cream
Grated zest and juice 1  lemon

Methods
  1. Mix together the butter and biscuit crumbs. Press the mixture firmly into the base of a 22-23 cm loose bottomed cake tin and chill whilst preparing the filling.
  2. Beat together the Philly, sugar until smooth. Add the eggs, one at a time, mixing on low speed after each addition until just blended. 
  3. Stir in the flour, soured cream and lemon zest and juice.
  4. Bake at 170⁰ C, gas mark 3 for 1 hour or until firm. Turn off the heat and leave to cool in the oven for 1 hour. Chill completely before serving. If liked serve with seasonal berries. 


Tuesday, February 28, 2012

Homemade Kaya

I missed the Kaya from Singapore and toast bread, but the best Kaya Toast that i had ate before is not from Singapore but Penang. Last time whenever i was on business trip to Penang, the No. 1 must eat breakfast is half boiled egg with kaya toast at any coffeeshop. I don't know why their Kaya Toast just taste so nice.

I found quite a number of kaya recipe and decided to try out a more easy version. Usually when i try out a new recipe, i will reduce the ingredient by half.

Ingredient
6 eggs
250g sugar
3 pandan leaves
250ml coconut milk

Method
  1. Gently beat the egg and sugar together until the sugar dissolves. Try not to beat too hard which will create foam.
  2. Wash the pandan leaves and dry it out with kitchen towel. Tie the pandan leaves with a knot.
  3. Use a double boiler, add eggs, pandan leaves and coconut milk and mix them.
  4. Stir the mixture until thick paste. (I stir for about an hour)

Monday, February 27, 2012

Cream cheese in France

Can you imagine i spend months before i got the right cream cheese. I have been researching through the Internet trying to find cream cheese in France. Then i realise French don't eat cream cheese. And the difficult part is you can't do direct translation from English to French for cream cheese, cos you will never find it on the cheese shelves.

After researching, i found three brands which carry cream cheese, Philadelphia (US brand), Kiri (French brand) and St Moret (French). Even when i manage to find the brand and try to get it at the supermarket, i still failed. Each brand has its line of cheese products on the shelves and with different French label. I was so confused after browsing 20mins on the cheese with my hubby face turning from red to black, and i give up.


I returned home and try to google it to find the image of the correct cream cheese from Philadelphia and Kiri. While searching, i found out that St Moret cream cheese taste more salty and not so recommended for baking.


Next morning, i returned to the supermarket and got the Philadelphia and Kiri cream cheese. For Philadelphia, it is labelled as à tartiner and pack in a plastic container while Kiri is labelled as à la crème de lait and is wrapped into individual cubes in a box.

Usually most people use Philadelphia's cream cheese for baking. I was really lucky to got this in France as Philadelphia just launched them in France market last year. France has different types of cheese here, so Philadelphia actually aiming to create new concept to use it as cooking cheese for the market here.


While getting the Kiri cream cheese off the rack in Intermache yesterday, i saw this snack from Kiri. I remember reading from its website, saying that Kiri targeted audiences are actually kids, so they have this biscuits stick with cream cheese snack. I was so tempted and decided to give it a try. Thumbs up!. I love this, and its going to be in my favourite snack list.

Wednesday, February 22, 2012

Baileys Chocolate


I don't know what to give my hubby for Valentine's Day, after long consideration i decided to make chocolate for him. I love Baileys and my hubby love chocolate so decided to make this Baileys Chocolate. I love this chocolate, it is not hard but a bit soft. It melt in your mouth.

Ingredients
200g condensed milk
50g butter (cut into small pc)
125g brown sugar
1 Tbs honey
125g dark chocolate (cut into small pc)
30ml Baileys Original Irish Cream Liquor
2 Tbs cocoa powder

Method
  1. Combine the condensed milk, butter, sugar and honey in a saucepan. Stir in medium-low heat till sugar dissolves.
  2. Increase heat to medium-high and stir for 15 mins until the mixture become thick. Remove from heat.
  3. Add the chocolate and liquor, stir until chocolate melts and mixture is smooth.
  4. Pour into chocolate mould and set aside for 1 hr to cool.
  5. Cover with plastic wrap and place in the fridge overnight.
  6. Cut the chocolate to your preferred shape or smaller pieces.
  7. Pour cocoa powder into a small bowl. Put the chocolate into the bowl to coat with cocoa powder.
  8. After coating, take the coated chocolate and pad lightly on a kitchen towel to remove access cocoa powder.
  9. Serve.
I do this at the room temperature of about 5°C, and my action has to be fast before the mixture start to harden.

Wednesday, January 18, 2012

Pineapple Tart

Last month i have try baking the open version Pineapple Tart. I did try the closed version but find it difficult to wrap so i give up the idea after two failed wrap. I just cannot get through the failed feeling, so i wanted to try it again BUT is a half closed which is roll version. And yes i did it.

Ingredients of pastry
150g plain flour
l/4 tsp salt

2 tbsp corn flour
1t tsp vanilla extract
100g butter
1 1/2 Tbsp icing sugar
1 egg yolk


Ingredients of filling
2 pineapple (about 1.3kg each)
1 cup sugar
2 cinnamon stick
2 star anise
6 cloves

For glazing
1 egg yolk

Method
To make the filling (One Night Before)
  1. Shred the pineapple finely. Put the shredded pineapple into a blender to blend again. Seperate the pineapple pruree from the juice.
  2. Pour in the pruree into a saucepan and put on medium heat. Pour in the sugar, cinnamon stick, star anise and cloves. Stir the mixture together and continue to stir for another 90mins unil the juice evaporated.
  3. Store the pineapple Jam into a jar and put in the refrigerator over night. This will help to thicken the jam further.
To make the pastry
  1. Mix the butter and icing sugar until light and fluffy.
  2. Beat in the egg yolk. Add vanilla extract and salt, continue beating until fluffy.
  3. Add in the flours and use hand to mix into a dough.
  4. Set aside for 30mins.
  5. Roll the dough into flat sheet with rolling pin or beer bottle to about 2mm thick.
  6. Use pizza cutter to roll up and down on the pastry sheet to form lines pattern.
  7. Cut the sheet to about 3-5cm wide and 7cm long
  8. Put about 1/4 tsp of pineapple jam on the cut sheet and roll the sheet with your finger
  9. Glaze the surface with egg yolk.
  10. Bake in preheated oven of to180°C for 15min until light brown


Monday, January 16, 2012

自製豬肉乾 BAK KUA

Here in France, i don't think i am able to find shop selling bak kua and it is a must must eat during Chinese New Year. I have bake twice so far. the first time i add honey but do not really like it so i try the second time without honey and i think is better.

One of the trick to eat nice bak kua is to put into the microwave for 30s before eating. Is 30s NOT more than that. The bak kua will be soft and nice.

Hope everyone love this homemade Bak Kua.


Ingredients:
500g minced pork (with fats)
1 1/2 Tbsp fish sauce
1 Tbsp dark soy sauce
1 Tbsp light soy sauce
1 Tbsp cooking wine
1/2 cup sugar

Methods:
  1. Put the meat and add in all the seasoning in a mixing bowl. Use chopsticks and stir until the meat becomes gluey.
  2. Place the meat on a parchment paper and use a roller or beer bottle to roll the meat to 2-3mm thick.
  3. Put the meat sheet onto the braking tray.
  4. Preheated oven at 120°C and bake for 20mins.
  5. Increased to180°C and bake for another 20mins. (Watch out as it will burned easily)
  6. Cooled and cut.

Monday, January 09, 2012

Almond Cookies

I always like to have light afternoon break with my Nespresso Coffee, cakes and cookies. Thanks to my hubby, my homemade cookies run out quite fast. Sometimes when he reached home, i was still preparing dinner and he will go the search for something to munch.


Ingredients:
100g unsalted butter
100g caster sugar
1 egg, beaten
4 drops of almond essence
150g self-raising flour, sifted
25g grounded almonds

Methods:
  1. Preheat the oven to 180°C. Line your baking tray with non-stick baking paper. (I used non-stick baking tray.
  2. Cut the butter into smaller pieces. Beat the butter and sugar together until light and fluffy.*
  3. Beat in half the egg with almond essence.
  4. Add flour and almonds. Use hand to work into a soft dough.
  5. Rolll into a long dough and cut them into equal small pieces.
  6. Roll each small piece into a ball and place onto the baking tray. Flatten each slightly. Place them with space apart.**
  7. Beat the reserved egg with 2 tablespoon of cold water and brush over the cookies. Bake for 15 minutes until pale golden and crisp.***
*I bake this at night when the room temperature is at about 6°C. I know if i used my mixer to mix the butter and sugar, the butter will not melt, therefore i beat at hand first then i transfer to the mixer to mix further.
**You have to leave enough space. When you put into the oven, during baking, the cookies will expand its width.
***I put 3 pieces to test out how much it will expand, and i forgotten to brush with the egg but it turn out quite nice, therefore i skip this for the rest of my cookies.


Thursday, December 29, 2011

Banana Cake

I always love banana cake. Maybe is due to my mummy who also like banana cake. I remember i only buy it when i go shopping with my mummy, then we will split half for each other to take back home.
That day i come across the recipe and would really like to try it out myself but do not have any confident, therefore instead of using the full ingredient i reduced everything to half.. Yeah i was lucky, the result was not too bad.

Ingredients
200g butten, soft
225g sugar
2 eggs
250g all purpose flour
1 tsp baking powder
1 tsp baking soda
2 big banana (mashed it)
60ml fresh milk / whole milk (i used fresh milk)
1/2 tsp banana essence (i never used this)

Method
1.Cream butter and sugar until light and creamy with electric mixer.
2.Pour in egg, one at a time and beat until creamy.
3. Add in fresh milk, mashed banana and mix well.
4. Add in flour, baking powder and baking soda and beat until combined.
5. Pour into a greased and floured pan* and bake in preheated 180°C oven for 35 minutes. Cool in pan for 10 minutes before inverting it to cool completely on a wire rack. Store in air-tight container.

*I used silicon mold therefore i never greased and floured.


Tuesday, December 13, 2011

Chocolate Lava Cake

This is my first time trying to bake a cake and is for my hubby. There isn't any bakery nearby within walking distance that i can buy a birthday day for him, therefore i struggle and finally i decided to bake a cake for him. His favourite is chocolate so here is the born of my first chocolate cake.

Ingredients

100g dark chocolate (cut to small cubes)
100g butter (cut to small cubes)
2 eggs
50g caster sugar
20g self-raising flour
Icing sugar to decorate

Methods
1. Melt dark chocolate using either the microwave, a hot water bath or a double boiler.
2. Melt butter using either the microwave, a hot water bath or a double boiler.
3. Use an electric whisk to beat the eggs and sugar till the mixture turns pale and frothy. This will take a few minutes.
(The first time when i am doing, i have not own a electic mixer, therefore i use whisk manually with hand for about 30 minutes.)
4. Pour melted chocolate and butter into the egg and sugar mixture. Stir in the flour. Use a spatula to mix everything evenly.

5. Grease your mold with some melted butter (so that the cake will come off cleanly when it is baked). Fill the mold about 3/4 full with the chocolate mixture and bake in a preheated oven of 180°C for about 10 minutes.  The cake is deliberately slightly undercooked so as to achieve its ideal consistency which is runny in the middle.  (The first time i bake this, i overbake but the moist the chocolate cake real yummy too.)
6. When it is baked, remove mold from oven and let cool for 1-2 minutes. Use a spoon to gently loosen the edges. Carefully invert the cake onto serving plate.
7. Serving suggestion: Use a sieve to dust icing sugar over the cake. Serve a scoop of vanilla ice cream and some berries at the side.